
You can subscribe to receive my blog regularly by email by using the subscribe box on the lower right hand side of the blog page at www.susanashbrook.com/blog. If you choose to subscribe you will receive a message from feedburner to confirm your subscription. It is totally safe to do so, and of course, you may unsubscribe at any time.
Well, it's here... we've waited for many, many months, gone through a long and cruel Winter, an "interesting" Spring and, guess what? It's finally Summer... we actually made it!
As a child, I remember the countdown to the end of school and waking up on the first day of summer holidays feeling like the weight of the world had been lifted from my shoulders. It was a joyous feeling of absolute and unconditional freedom! For those of you closer to my age... do you remember this?
No more pencils
No more books
No more teacher’s
Dirty looks.
As an adult I lament the loss of that feeling. Currently I am counting down the days because there are deadlines to meet and things that need to be done. Organizing, promoting and preparing for Summer classes and workshops; preparing for new classes at area retirement residences; looking after registration details and payments for fall events; making arrangements for Fall classes and workshops. Whew! And that's not to mention that I want to get out to the studio and paint all those paintings that are burning a hole in my brain!
I must admit that writing this blog has had the unexpected but very pleasant consequence of getting me into the studio on a regular basis to do the painting update for each post, and of course, once in the creative space other stuff just starts to happen... can't be stopped!
My students at the Cumberland Lodge are starting to get really excited about their upcoming art exhibition on Sunday, July 12, from 1:00 to 3:00 PM. The Lodge is at 2564 Market Street in Cumberland Village and you are invited to stop by if you are in the neighbourhood. The artists would love to see you and tell you about their work. It's been a truly amazing experience for me. These people, with the various disabilities and limitations that they have, have produced some awesome works of art!
In addition to the artists, the Lodge's resident poet, Brenda Rose will be on hand to sign copies of both of her published books... she too is very talented! I hope you will take the time to join us for a great creative experience and refreshments.
Today's Painting Tip: Creating Abstract Art
Expressive, or intuitive abstract allows the image to be generated from inner feelings and emotions. The artist slaps on or spreads the paint based on what they are feeling at the time. While it's great therapy it does not always generate great art.
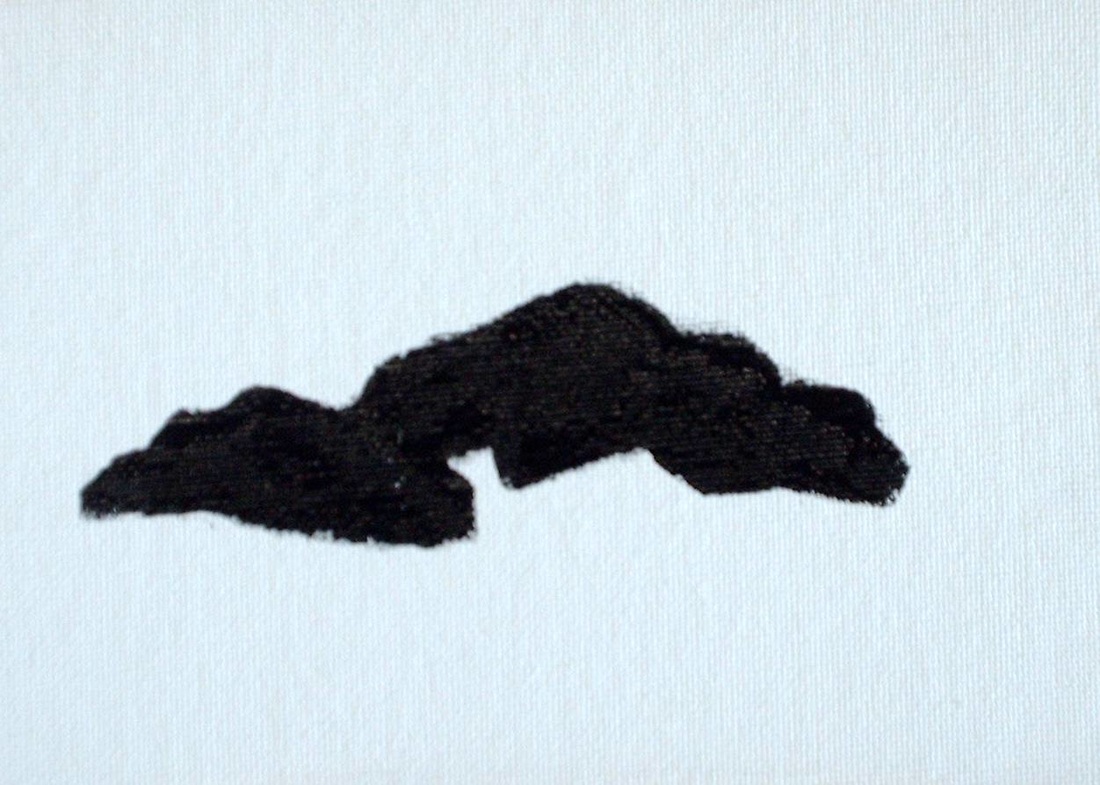
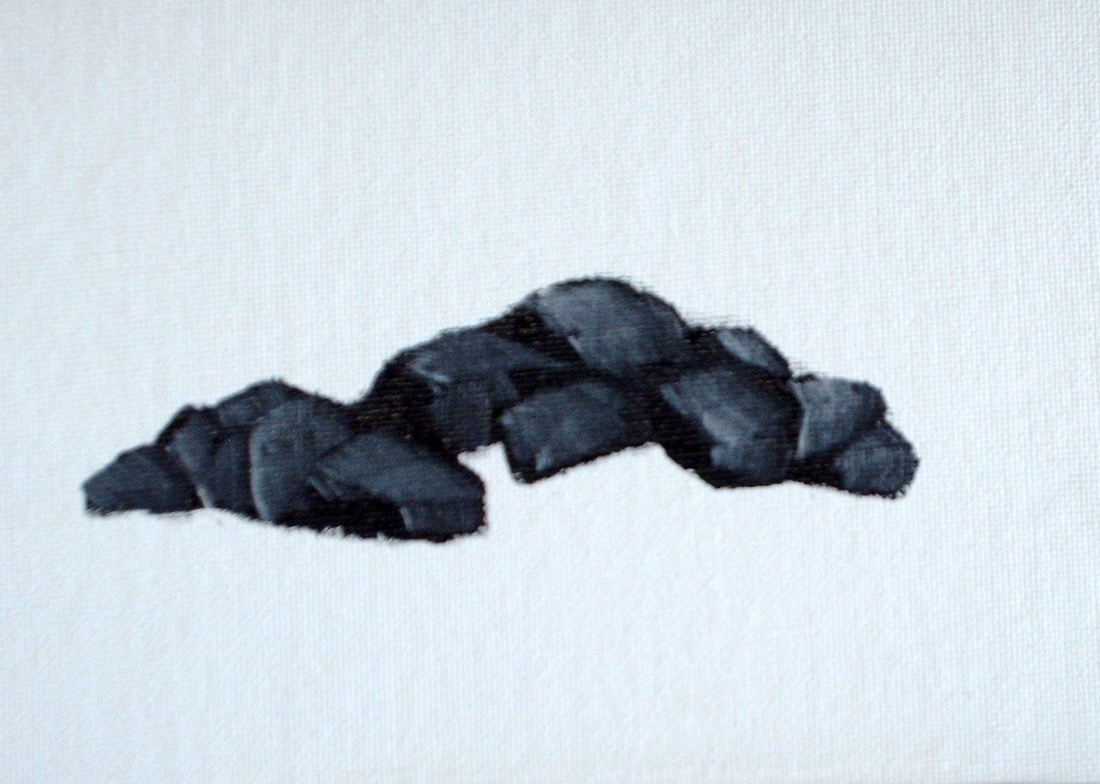
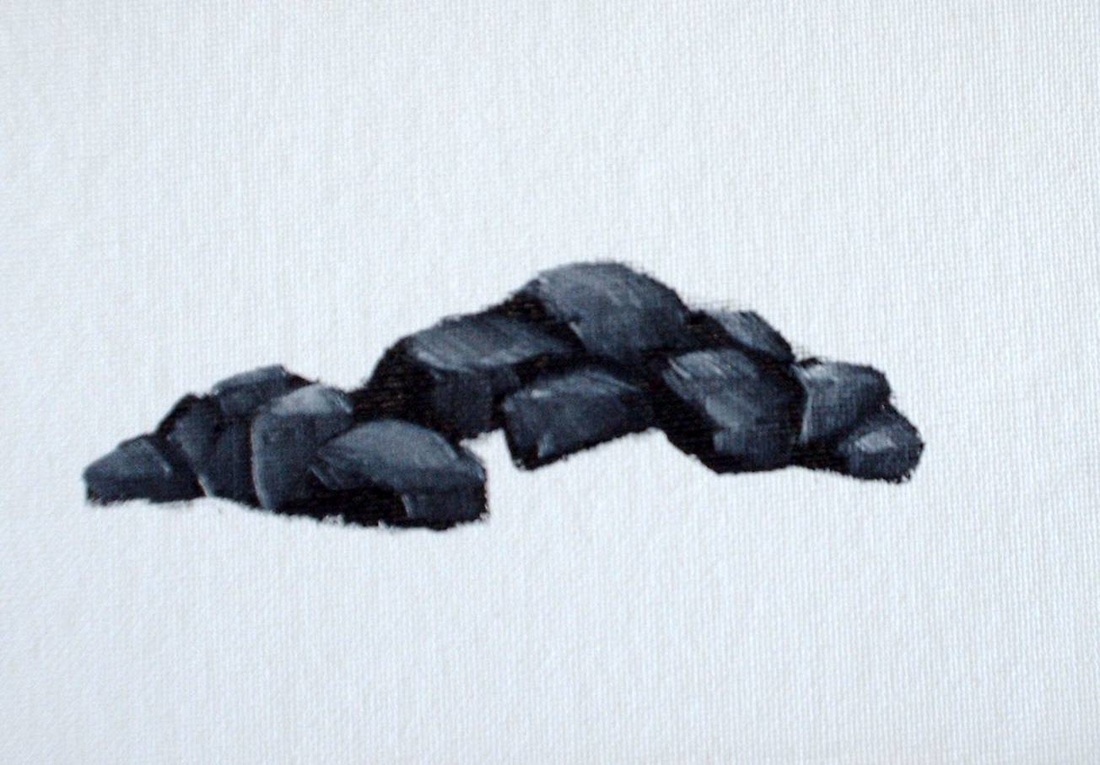
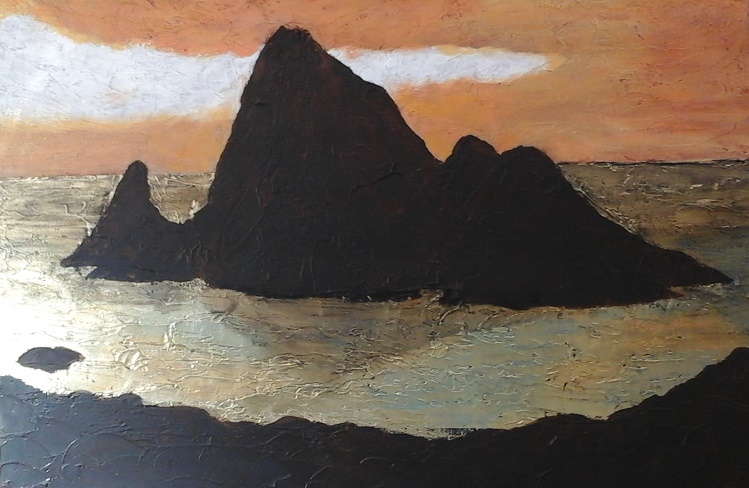
Abstracting reality works by removing detail, depth, shadow and perspective. Simplify shapes and change the colours. Reduce the painting to basic shapes and lines.
Close-up of Reality... The closer you get to something the less recognizable it becomes. When it is no longer obvious as to what it is, we begin to see it as pure design
You can also generate basic designs on your computer using "autoshapes" provided with some software to block in areas, shapes and colours etc, to get you started or help solidify your ideas.
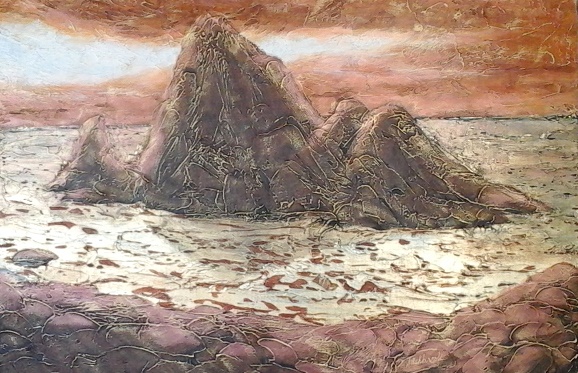
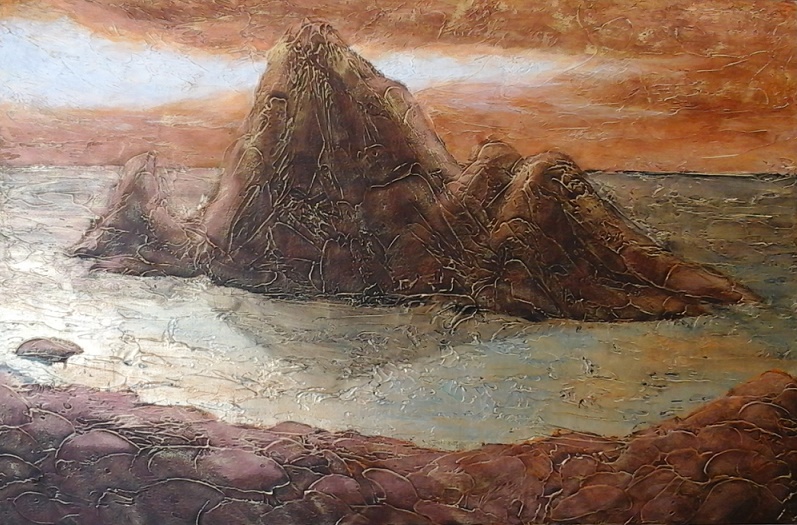
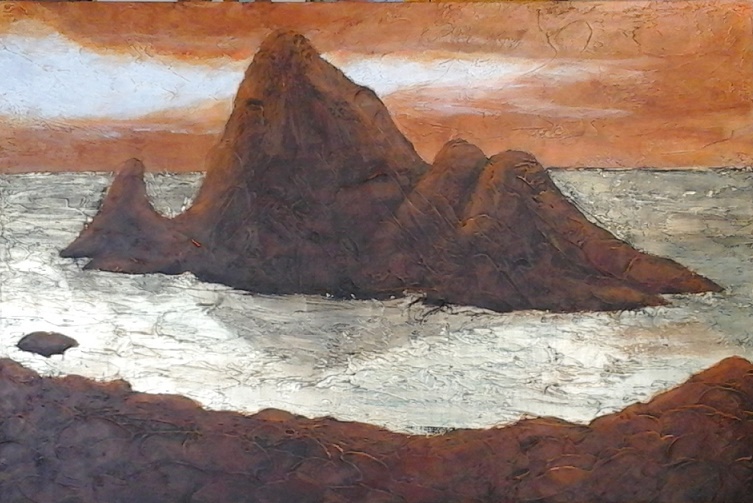
Update on the Painting from Jane's Photograph:
The painting is finished and I'm very pleased with it! After last weeks work I added some burnt sienna and Payne's gray to the texture in the water, to create the reflection of colour from the rocks. It gives the painting some definition. I'm also loving the effect of the gold leaf in the painting, it's brilliant!
I have applied an isolation layer of liquid medium to protect the paint from the varnish, which will be applied in a few days, after the isolation layer has cured.
What's next? Well, lot's actually... paintings already in progress and some new ones that I'm really excited about. Please stay tuned!
Thanks and best wishes,
Susan
Well, it's here... we've waited for many, many months, gone through a long and cruel Winter, an "interesting" Spring and, guess what? It's finally Summer... we actually made it!
As a child, I remember the countdown to the end of school and waking up on the first day of summer holidays feeling like the weight of the world had been lifted from my shoulders. It was a joyous feeling of absolute and unconditional freedom! For those of you closer to my age... do you remember this?
No more pencils
No more books
No more teacher’s
Dirty looks.
As an adult I lament the loss of that feeling. Currently I am counting down the days because there are deadlines to meet and things that need to be done. Organizing, promoting and preparing for Summer classes and workshops; preparing for new classes at area retirement residences; looking after registration details and payments for fall events; making arrangements for Fall classes and workshops. Whew! And that's not to mention that I want to get out to the studio and paint all those paintings that are burning a hole in my brain!
I must admit that writing this blog has had the unexpected but very pleasant consequence of getting me into the studio on a regular basis to do the painting update for each post, and of course, once in the creative space other stuff just starts to happen... can't be stopped!
My students at the Cumberland Lodge are starting to get really excited about their upcoming art exhibition on Sunday, July 12, from 1:00 to 3:00 PM. The Lodge is at 2564 Market Street in Cumberland Village and you are invited to stop by if you are in the neighbourhood. The artists would love to see you and tell you about their work. It's been a truly amazing experience for me. These people, with the various disabilities and limitations that they have, have produced some awesome works of art!
In addition to the artists, the Lodge's resident poet, Brenda Rose will be on hand to sign copies of both of her published books... she too is very talented! I hope you will take the time to join us for a great creative experience and refreshments.
Today's Painting Tip: Creating Abstract Art
Expressive, or intuitive abstract allows the image to be generated from inner feelings and emotions. The artist slaps on or spreads the paint based on what they are feeling at the time. While it's great therapy it does not always generate great art.
Abstracting reality works by removing detail, depth, shadow and perspective. Simplify shapes and change the colours. Reduce the painting to basic shapes and lines.
Close-up of Reality... The closer you get to something the less recognizable it becomes. When it is no longer obvious as to what it is, we begin to see it as pure design
You can also generate basic designs on your computer using "autoshapes" provided with some software to block in areas, shapes and colours etc, to get you started or help solidify your ideas.
Update on the Painting from Jane's Photograph:
The painting is finished and I'm very pleased with it! After last weeks work I added some burnt sienna and Payne's gray to the texture in the water, to create the reflection of colour from the rocks. It gives the painting some definition. I'm also loving the effect of the gold leaf in the painting, it's brilliant!
I have applied an isolation layer of liquid medium to protect the paint from the varnish, which will be applied in a few days, after the isolation layer has cured.
What's next? Well, lot's actually... paintings already in progress and some new ones that I'm really excited about. Please stay tuned!
Thanks and best wishes,
Susan

 RSS Feed