
Well, it's been another busy week, but at least I have time to write to you, which I love doing.
First, I must tell you I was moved to hugs and tears by my students at the local village retirement residence where I have been volunteering my skills and knowledge as an art teacher.
In the Spring I was able to set up a weekly program for them, thanks to the generosity of a group of clients of Lynn Cain, of Cain & Osborne Associates http://www.cainandosborne.com/, who each donated $20 to provide the art supplies for the program. The program culminated in an exhibition of the participants work. Each participant was able to have one piece of art framed, thanks to the generosity of Karen at Sienna Gallery in Rockland http://www.siennagalleryandframing.ca/. The students were so pleased with how the exhibition went that there started to be talk of a Christmas Bazaar to sell their other creations.
The enthusiasm was contagious and with the help of Cheryl, the program coordinator, we extended the program to include Christmas crafts.
Weekly Flowers http://www.weeklyflowers.com/ has very generously offered to donate the signage for the event, which will be held on Saturday, December 5, from 9 to 11:30 AM, to coordinate with the Cumberland Christmas Market.
I hope you will take the opportunity to visit the Bazaar and the Christmas Market. It's a great event in the Village of Cumberland!
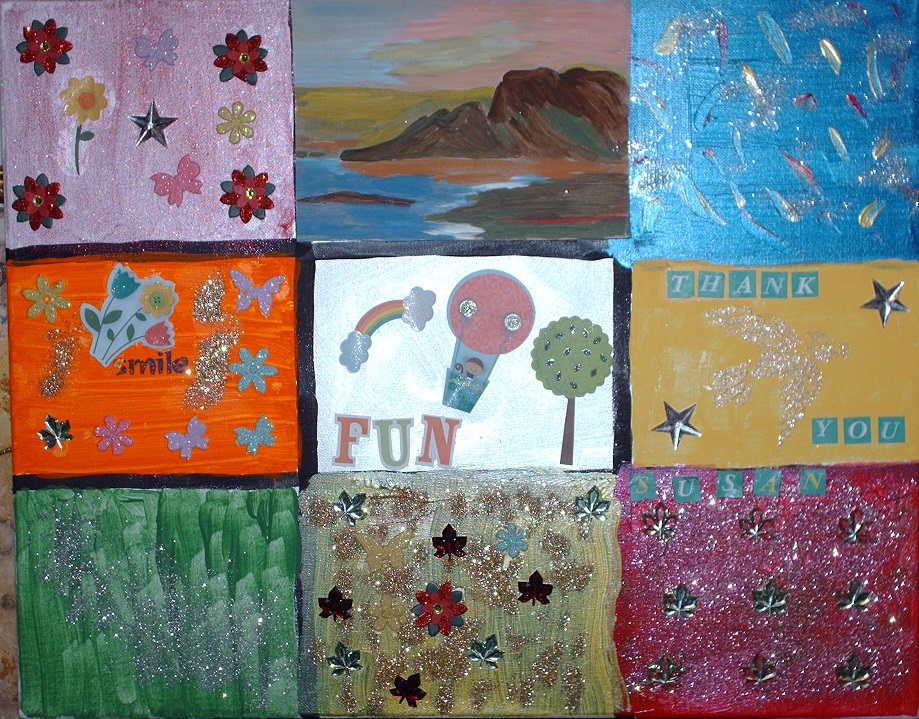
So, what touched me so deeply was that the participants in the program created a very special piece of artwork to thank me for working with my very generous sponsors and donors to provide this program for them. It is a piece that I will hang with pride in my studio and treasure forever.
First, I must tell you I was moved to hugs and tears by my students at the local village retirement residence where I have been volunteering my skills and knowledge as an art teacher.
In the Spring I was able to set up a weekly program for them, thanks to the generosity of a group of clients of Lynn Cain, of Cain & Osborne Associates http://www.cainandosborne.com/, who each donated $20 to provide the art supplies for the program. The program culminated in an exhibition of the participants work. Each participant was able to have one piece of art framed, thanks to the generosity of Karen at Sienna Gallery in Rockland http://www.siennagalleryandframing.ca/. The students were so pleased with how the exhibition went that there started to be talk of a Christmas Bazaar to sell their other creations.
The enthusiasm was contagious and with the help of Cheryl, the program coordinator, we extended the program to include Christmas crafts.
Weekly Flowers http://www.weeklyflowers.com/ has very generously offered to donate the signage for the event, which will be held on Saturday, December 5, from 9 to 11:30 AM, to coordinate with the Cumberland Christmas Market.
I hope you will take the opportunity to visit the Bazaar and the Christmas Market. It's a great event in the Village of Cumberland!
So, what touched me so deeply was that the participants in the program created a very special piece of artwork to thank me for working with my very generous sponsors and donors to provide this program for them. It is a piece that I will hang with pride in my studio and treasure forever.
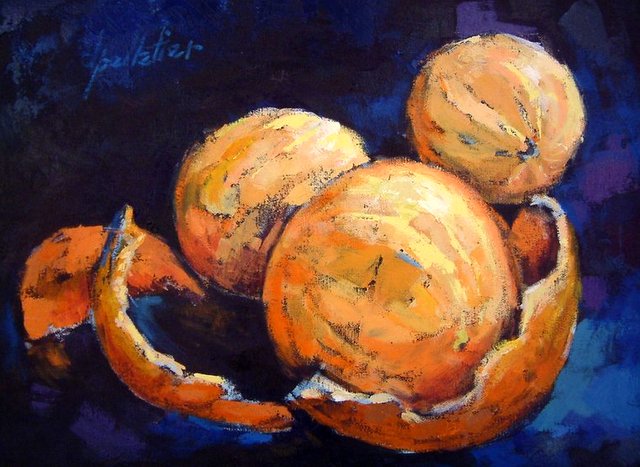
Today's Painting Tip: White
As artists we usually choose Titanium White as our standard white, but there are other options and it's interesting to see the results we get from each of them. I suggest that you set up a chart on a piece of heavier weight paper or canvas paper, depending on your medium, and test some of the various whites with your other colours to see what results you can achieve.
The ones that come immediately to mind are Titanium (PW6) of course; Zinc White (PW4), often called Mixing White; Flake White (PW1) which is a good pigment in oils but not so much in other media. There are a number of others, but they are not readily available these days, having lost favour in the colour pigment market. Alternately there are whites with other influences, such as Titanium Buff, Unbleached Titanium, Warm White and a few others that offer interesting options.
If you create a chart with your usual colours down one side and a range of whites across the other axis, you will be able to see what additional colour variations can be achieved with the various whites. I think you might be surprised! Let me know what you think.
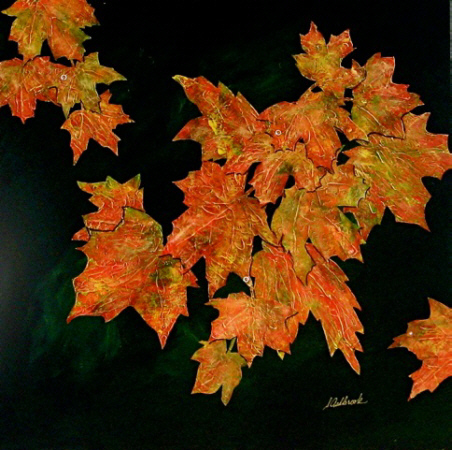
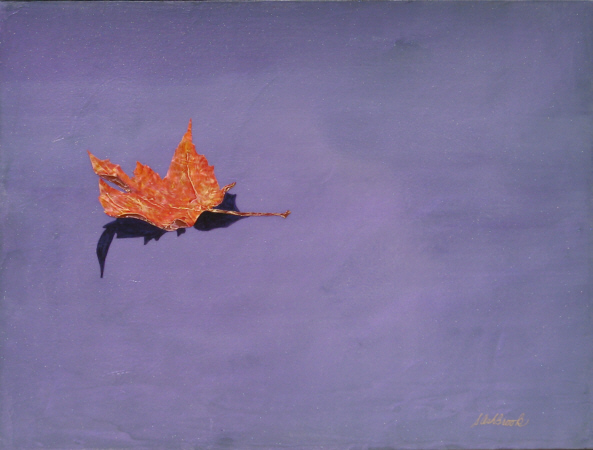
The New Painting: Appliquéd Leaves
I have been working on fall leaves to create a fall painting. I'm using gel medium to create leaves with substance, that will give the painting addition dimension rather than just painting it.
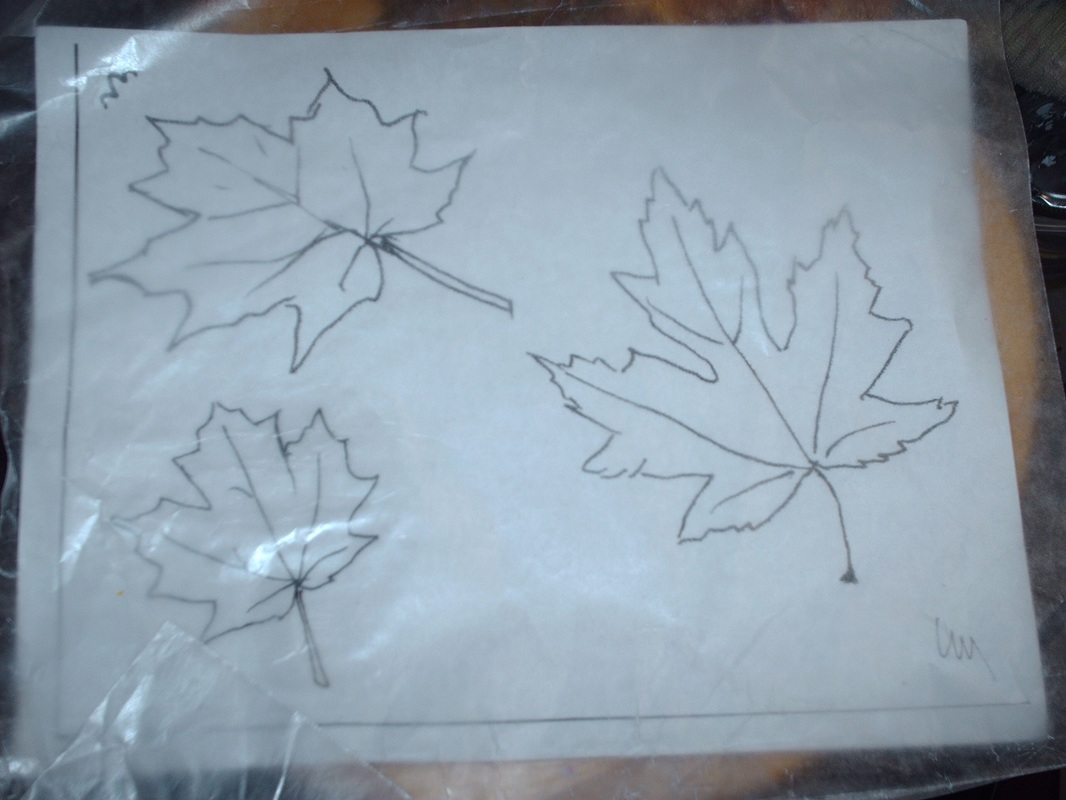
I started out by drawing shapes of leaves and scanning them into my computer. I did this so that I can print them in any size that I need, depending on the piece I want to produce.
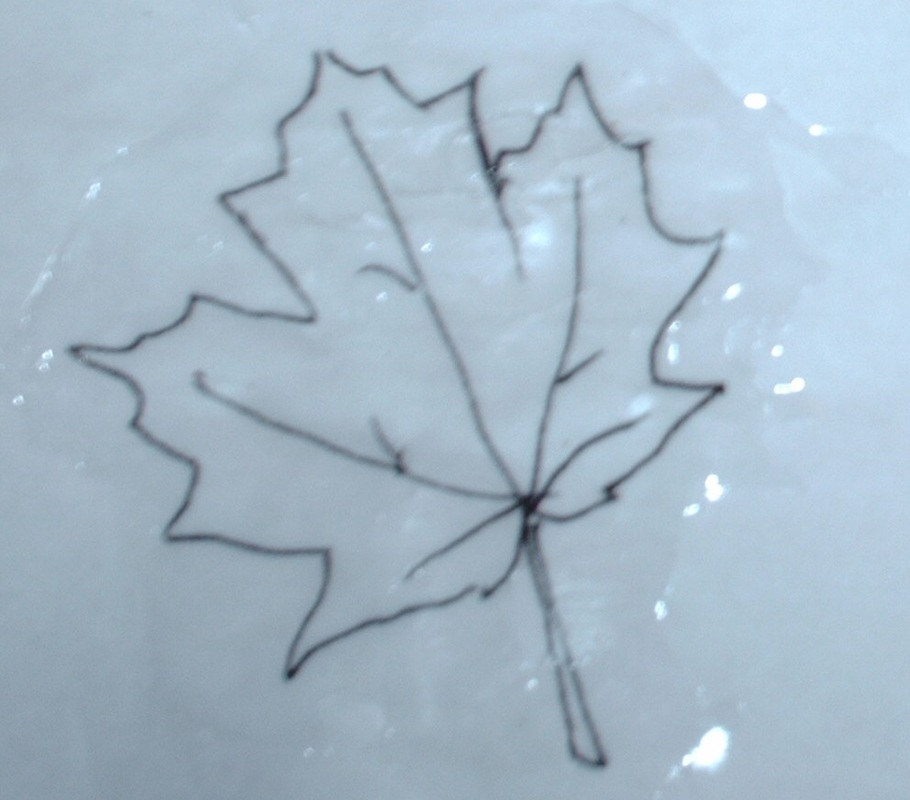
Having printed off sheets of the leaves I wanted, I then taped a piece of waxed paper over each sheet of leaves. Then I applied an even coat of gloss gel medium over the leaf drawing, on the waxed paper. I let that dry completely and then I outlined the original leaf drawing, on the dried gel medium with a permanent fine marker. Then I applied a second layer of gel medium, but this time I created texture on the leaf outline as well as defining some of the leaf veins. This will create visual interest in the appliqués for the final painting.
When the second layer is dry I cut out the leaves, with a pair of scissors, which is why I outline them with the permanent marker. Once that is done I spritz the wax paper backing with water, let it sit a few minutes and then peel or roll it off.
More next week, but don't forget that your comments, suggestions and requests are always welcome at http://www.susanashbrook.com/blog.
Best wishes,
Susan


 RSS Feed