Looks like I have an enthusiastic group of entrepreneurs on my hands at the Lodge. They enjoy setting up the events and do much of the work, taking flyers around, putting notices up on telephone poles, looking after the sales themselves and then they pour all of the money they make back into art supplies for the next event.
This all started a year ago last winter, when I didn't get a grant that I had applied for, for a community art project at the Lodge. I was having lunch with my longtime friend and investment advisor, Lynn Cain (http://www.cainandosborne.com/) and told her about it. She asked me how much I needed for the art supplies, as I was willing to volunteer my time, and I told her. She got 10 of her clients to donate $20 each and the project was off to the races!
This set in motion the first art exhibition, which was followed by the first Christmas Bazaar, and now it is an ongoing cycle. I believe in the value of art, and it's not just as a therapeutic past time. The residents at the Lodge have taken this a step further and made it their little business, in which they take great pride and also fund their future art projects. And like most artists... they are having way too much fun doing it!
Today's Painting Tip: Making texture mediums
I love using texture in my work, and while there are a number of excellent commercial texture mediums available, I usually want something more specialized and original. That results in me mixing up my own custom textures on a regular basis. It's not difficult and if you store them properly, they will keep for years.
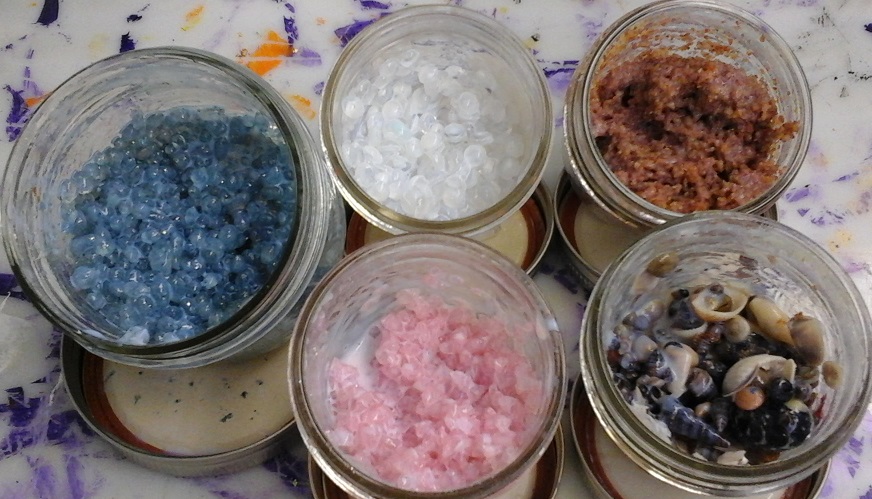
I start by putting my particulate into a small mason jar. I use mason jars because they come in a variety of useful sizes, the snap lids seal very well, and the snap lids and rings can be replaced very inexpensively if they corrode or get too gummed up with medium.
Next I start adding Self-Levelling Gel (Clear Tar Gel can also be used and to a slightly less effective mixture, Pouring Medium), and mixing it in. Start slowly, making sure the mixture is thoroughly mixed, and that you use only enough to coat the particulate. If you use too much you will end up with a sloppy mixture that will not work as well.
I apply texture mixtures with a palette or painting knife, either small or large depending on the surface area I am covering. Because the mediums I've recommended above are self-levelling they drip down onto the canvas creating a pool of medium for a better hold and also, while leaving a layer of the medium on top of your particulate to protect it, it's a thin layer so it doesn't hide the beauty of your particulate.
As you will see from the photo below, you can use lots of things to make texture mediums: small shells, assorted types of vase fillers, sand, aquarium gravel, glass beads, etc. You are limited only by your imagination. One thing to watch out for though, if you are using organic material such as dried beans, lentils, rice and the like, only mix up what you need at the time. These products absorb the moisture from the medium causing it to harden very quickly in the jar, even though it is tightly sealed.
By the way, if you want to clean a mason jar, pour out most of the medium, let the rest dry unopened, then soak it in a bucket of water for a day or two. Most products will come out easily after this process then the jars can be washed, dried and stored for re-use.
So have some fun with texture! Get creative and be original! And let me know what kind of wonderful mixtures you've created and how you used them. Can't wait to hear what you've done!
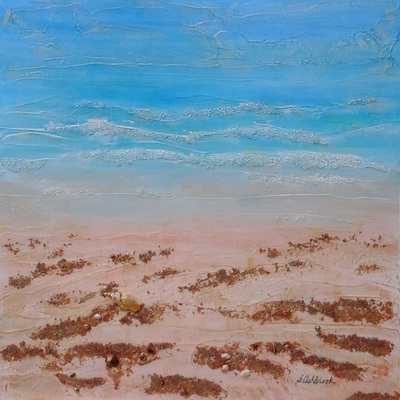
With the leaf paintings finished I hauled out a partially done canvas that I had used as a demo piece at last fall's "Art School Fair", here in Ottawa. The demo had been about creating texture mediums and using them. For this piece I mixed sand with self-levelling gel for use on the beach, and plastic bead vase filler for use on the waves.
Prior to applying the texture mediums I had coloured my canvas to start and then applied gloss gel medium to create a textured surface gently suggesting the pattern of the waves and the ripples in the sand. Once the medium was dry enough to work I painted it with several layers of paint, the second last one being interference paint, and the final one being gold metallic paint, brushed lightly over the texture marks to enhance them.
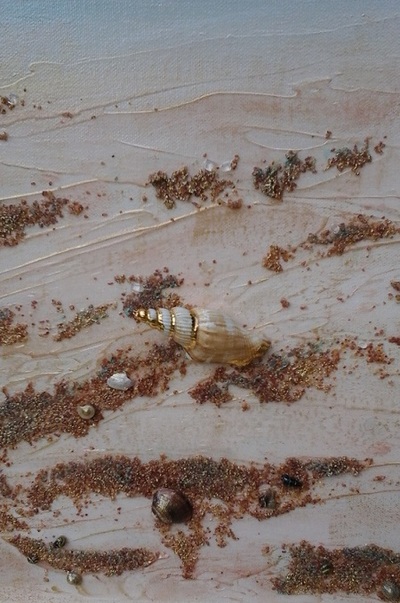
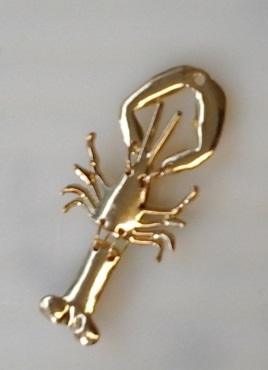
The next step was to apply the texture mediums that I had mixed to the areas I wanted to accent... the waves and the beach. I was pleased with the painting but felt it was missing some interest... a focal point. I thought a starfish washed up on the shore would work, and went off to find one. I could only find ones that were too large or too small, so poked around for something else that would be suitable. I found a gold coloured metal lobster and a seashell decorated with gold coloured metal, in the jewellery department of the craft store and rushed them back to the studio so see which I liked best in the painting. The shell won, mostly because you only notice it the closer you get to the painting, and I like adding little surprises for viewers who look carefully at my work.
So that's another painting ready to add to my collection for the New Edinburgh Studio Tour in September. If I keep going like this I'll have lots of great new stuff to show!
I'd love to hear your thoughts, ideas and suggestions for future blogs. Let me know what you would like me to include.
Best wishes,
Susan


 RSS Feed